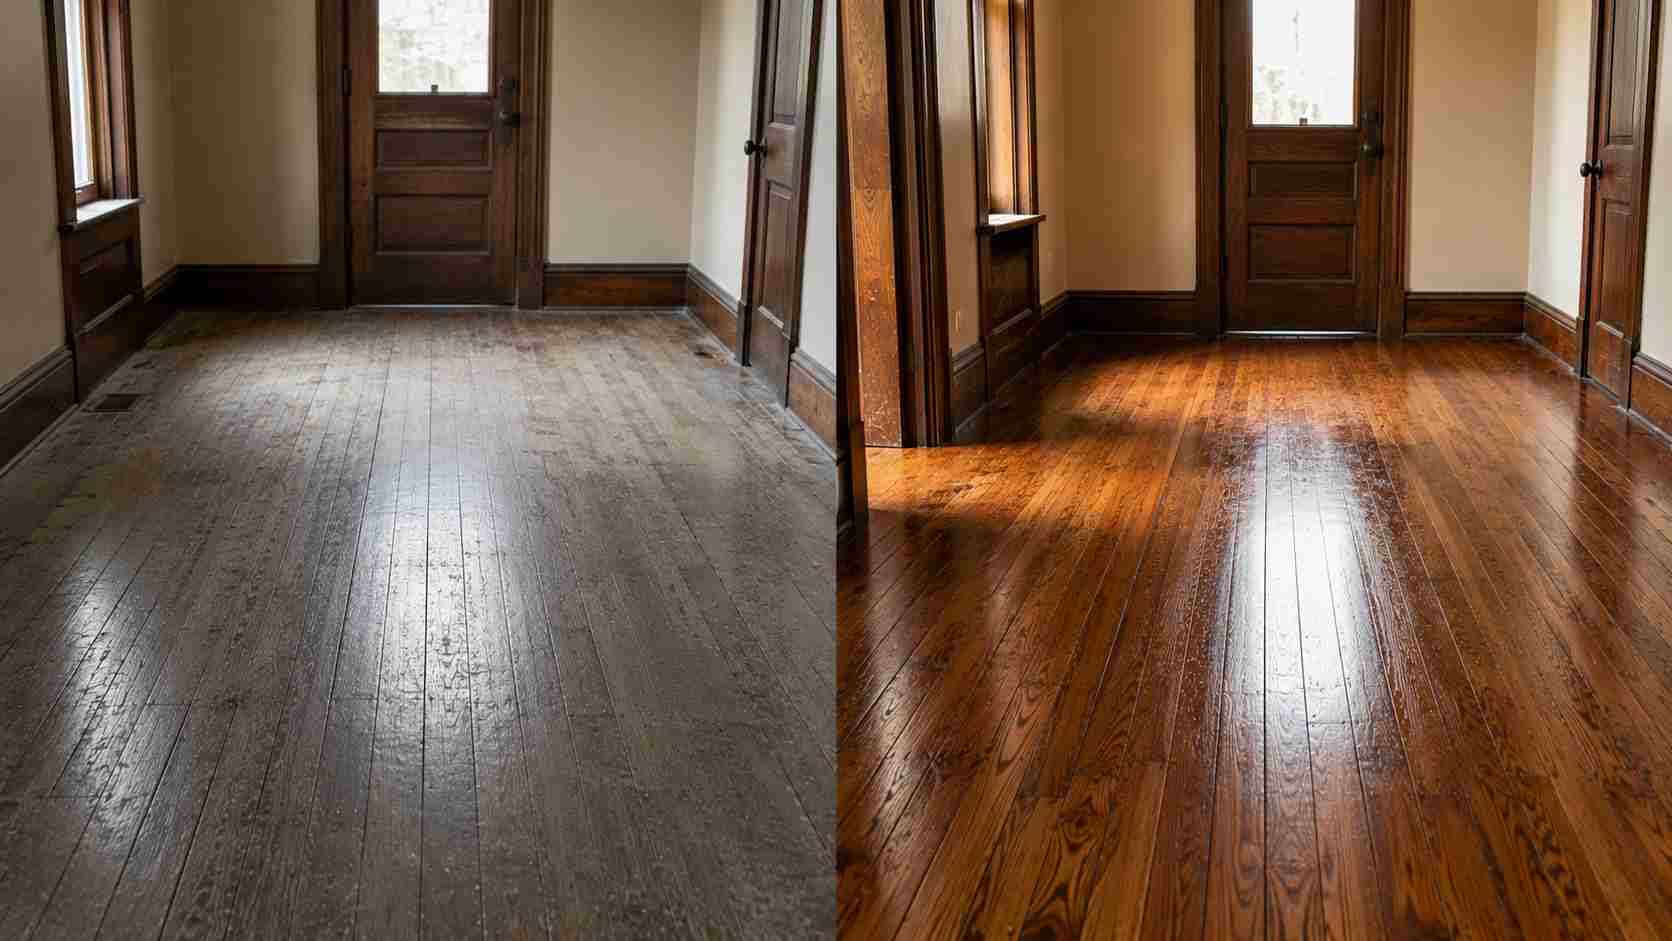
Almost 70% of homes built before 1970 still have original hardwood floors under carpet, dust, or rotted floors due to decades of neglect, and most of these floors can be salvaged. Even when you’ve just removed an old rug and discovered scratched, dull, or water-stained boards under it, it’s not a job that should be tackled by a $3,000–$8,000 professional refinisher.
Knowing how to restore original hardwood floors is simply identifying what type of damage is being caused, whether it’s dust, scratches, gaps, cracks, squeaks, or water damage, and pairing it with the appropriate repair. That can be a complete sand and refinish at times. In many cases, it’s something much, much simpler.
In this guide, you’ll learn:
- How to tell if your floors need refinishing or just deep cleaning
- How to restore hardwood floors without sanding
- How to fix gaps, cracks, squeaks, and water damage
- Real cost breakdowns (DIY vs. professional)
- How to restore original parquet flooring specifically
- A room-by-room decision framework so you never guess wrong
1. How to Assess Your Original Hardwood Floors First
If you’re investing in any product, you need to determine what you’re investing in before you go ahead and invest. This is the thing most guides overlook, and it’s the biggest mistake for DIY restorations.
Check the Wear Layer
Solid wood is typically original and often has been sanded and refinished 2-3 times throughout its life, as compared to engineered hardwood. A sanding will remove about 1/16 inch of wood. Usually, boards have 3/4″ of usable thickness, meaning that most floors can be sanded 4-6 more times without exposing the tongue and groove joints.
Quick test: Look for a heat register, closet, or floor vent cover. Lift it and inspect the edge that has been exposed. Determine the amount of wood above the tongue. Less than 1/8″ to the left? Sanding is dangerous – avoid it; go to the no-sand methods below.
Identify the Finish
Perform a solvent test: put a cotton ball in denatured alcohol and apply it to a hidden spot.
- Finish dissolves/softens → it’s shellac or wax (common before the 1960s).
- No reaction → it’s polyurethane or varnish.
It’s important because that’s what will decide if you can use a screen and recoat (poly) or wax stripping (shellac).
Look for Structural Red Flags
- Boards that flex or bounce when walked on
- Detecting mold, soft and spongy wood, or a musty odor
- Boards cupping (edges up from the center) — usually caused by moisture.
If you see any of these, please make sure to correct the moisture problem in the subfloor before refinishing the floor (it’s a waste of time and money).
2. How to Restore Original Hardwood Floors Without Sanding
If your floors are dull but otherwise in good shape, or have scratches or dirt on the surface, then you probably don’t need to sand the floors at all. This is the quickest, most cost-effective, and least messy route, and it is one of the top searched questions: How to make hardwood floors look new without refinishing.
Deep Clean First
Most “damaged” old floors are simply dirty. The finish can become gray and lifeless over the years due to a combination of wax buildup, pet dander, and dirt.
- Vacuum well (use a hard floor attachment – NOT a beater brush).
- Mop with a pH-neutral hardwood cleaner, and never a vinegar and water solution, which will dull the finish and, over time,e cause etching of old wax finishes.
- Allow to dry completely (24 hours) before evaluating the extent of damage.
Screen and Recoat (Buff-and-Coat)
This is the professional “no-sand” technique, and it’s a lot more affordable than a complete refinish.
- A floor buffer with a fine abrasive screen only scuffs the top layer of the existing polyurethane (not the wood).
- There is a new coat of poly over the scuffed surface.
- In-house sanding costs $1 to $2 per square foot DIY (buffer rental + poly), and $3 to $5 per square foot for full sanding.
This only works if:
- The finish currently used is polyurethane (not wax or shellac).
- In high-traffic areas, there is no bare wood showing.
- No discoloration from water or pet stains (screening will not remove these)
Restorative Polish and Rejuvenator Products
For light wear and finishes that include waxes, a hardwood floor rejuvenator (which is applied like a thick polish) can be used to fill in any fine scratches and add the shine without any mechanical abrasion. These are best used as a maintenance procedure, not as a solution to a deep gouge; they should last 1-3 years until a real refinish is necessary.
Natural/DIY Restoration Method
One of the most popular budgeting ideas for lightly used wax-finished floors:
- Use a mineral spirits-soaked cloth to remove old wax.
- Apply a thin layer of fresh paste wax and buff using a soft cloth or buffer.
- Perform this every 6-12 months as a maintenance routine (not a cure-all!)
It will not remove a deep scratch but is the best of the free tools to correct cosmetic dullness.
3. How to Refinish Hardwood Floors Cheap (Full Sanding Method)
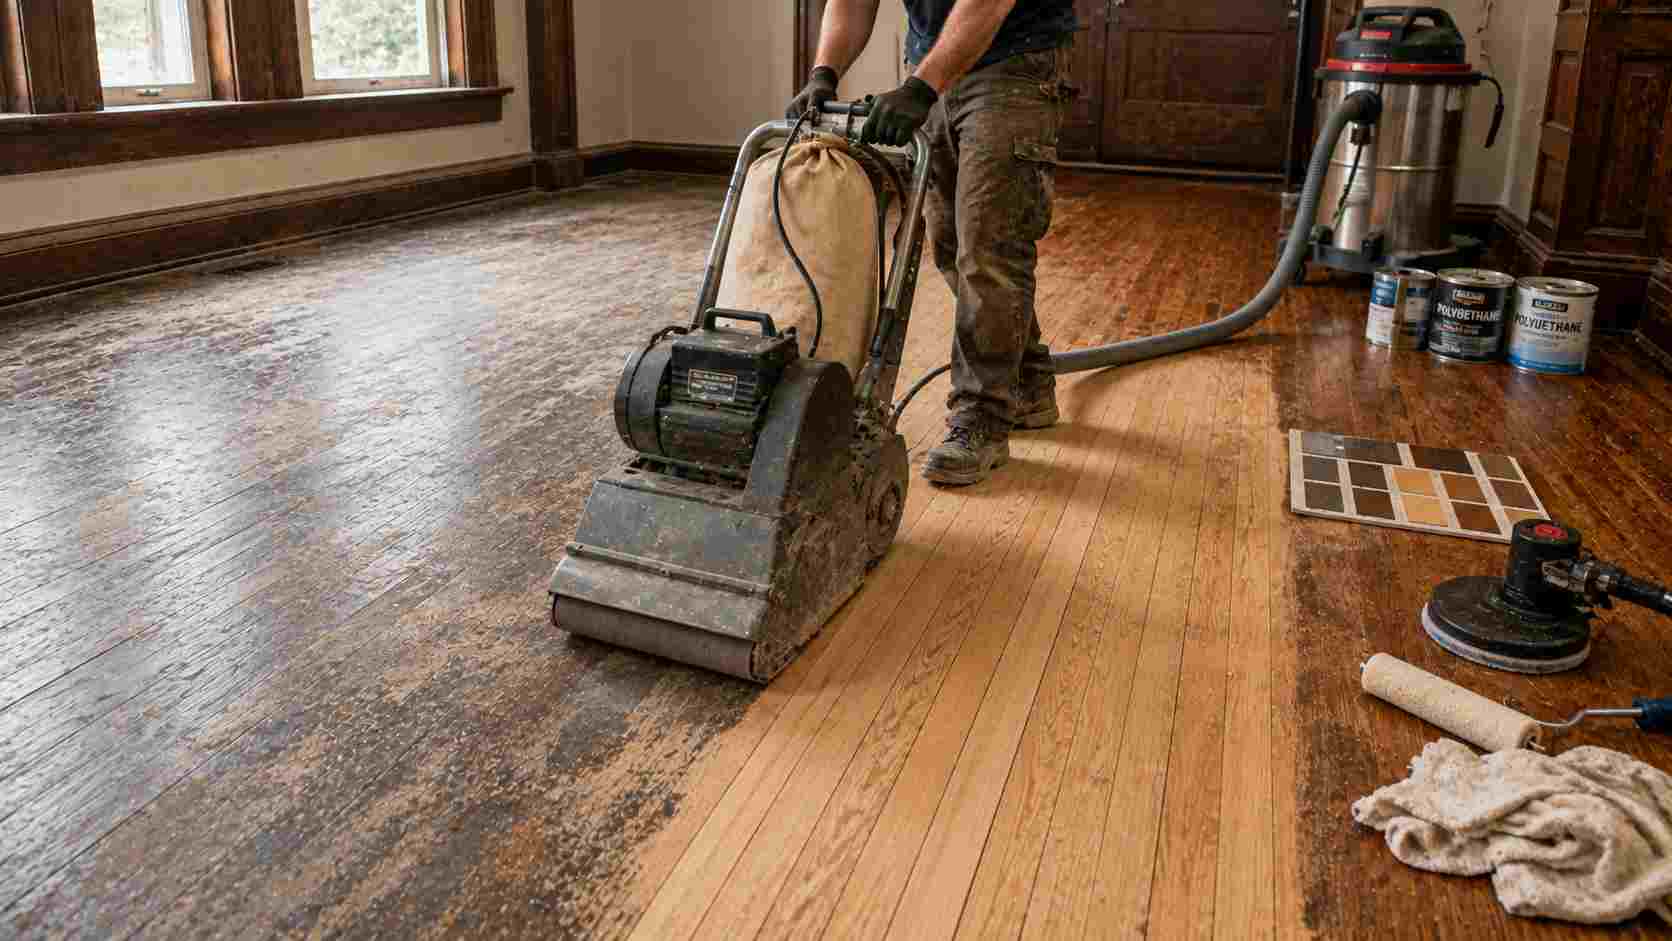
If the damage extends below the finish layer, such as deep gouges, stains, or uneven old coats, then a complete refinish is required. Here’s how to do it without spending over $3,000 on a crew.
Rent, Don’t Buy, Equipment
A drum sander or the more DIY friendly orbital floor sander is available at most hardware stores for $50-$75 per day. Sanding should take about one day for 300 sq. ft. of room, and an additional day should be reserved for edging and finishing.
The 3-Grit Sanding Sequence
- Coarse grit (36–40) — used for removing old finish and leveling boards.
- Medium grit (60-80) — removes sanding marks and smooths the surface.
- Fine grit (100-120) — prepares wood for even stain/finish application.
The number one cause of blotchy DIY refinishes is skipping the grits; always do the entire process from coarse to fine.
Stain, Seal, and Topcoat
- Use wood conditioner on soft and porous woods (pine, fir) to avoid blotchy stain absorption.
- Stain down the grain and wipe off in 5-15 minutes.
- Seal with 2–3 coats of water-based polyurethane (dries quickly and doesn’t yellow or have a strong odor) or oil-based (more durable, has an amber tone with time; this is often the preferred choice for restoring a “vintage” look on original floors).
Budget Breakdown (Cheap Refinish)
| Item | DIY Cost | Professional Cost |
| Sander rental (300 sq ft) | $100–$150 | Included |
| Sandpaper (all grits) | $40–$60 | Included |
| Stain (1 gallon) | $30–$50 | Included |
| Polyurethane (2 coats) | $60–$100 | Included |
| Labor | Your time | $1.50–$3/sq ft |
| Total (300 sq ft) | $230–$360 | $1,500–$3,500 |
DIY refinishing typically costs 80–90% less than hiring a contractor. The tradeoff is 2–4 full days of labor and a learning curve on technique.
4. Fixing Cracks, Gaps, and Splits in Hardwood Floors
Fixing Cracks in Hardwood Floors
Seasonal wood movement, foot traffic stress points, or drying due to age are the typical causes of hairline cracks or hardwood floor splitting. To fix cracks in hardwood floors:
Small cracks (less than 1/8 inch): Fill with a color-matched wood filler or a latex/wood-flour putty, pressed in with a putty knife and sanded smooth when dry.
Larger splits: Epoxy wood filler bonds to the split and will flex slightly with the board, which will minimize re-cracking.
Structural splits (through the full board): These require a wood sliver or matching board insert glued and clamped; filler is not enough to hold under weight.
How to Fill Large Gaps in Hardwood Floors
Old-growth wood shrinks differently over decades, and gaps in wooden floorboards are very common in original floors. To make up for gaps in a timber floor:
- Rope/cord method (gaps 1/4″–1/2″): Push jute rope or cotton cord into the gap and finish over with jute rope or cotton cord; the same method restoration pros use today.
- Wood filler with sawdust (gaps under 1/4″): Mix fine sawdust from the sanding step with wood glue to create a color-matched filler paste.
- Reducer strips (gaps > 1/2″): Thin wood strips glued and sanded flush; best to have a pro handle large gaps that are not even.
Note: Do not fill gaps greater than 3/8 inch with rigid filler only in humid climates; the wood will tend to buckle and expand from season to season. A little flexibility with filler or rope will allow slight movement.
Resurfacing vs. Refinishing — What’s the Difference?
Unfortunately, many homeowners make this mistake:
- Resurfacing = sanding down to bare wood and reapplication of finish (gouges, deep stains, old finish removed)
- Refinishing = a more general term that encompasses resurfacing AND recoating only (screen-and-recoat) without sanding to bare wood
When getting a quote, if they mention refinishing, always ask if it will include sanding or not. The price difference is significant.
5. Fixing Squeaky Hardwood Floors
Creaking noises from the floor occur when the boards rub against one another or when loose nails flex under weight. Not only is a squeaky hardwood floor a nuisance, but if the floor squeaks in one area, it could mean that the subfloor joint has loosened.
From Above (No Access to Subfloor)
- Walk slowly to find the squeak and mark the location.
- Install a trim-head screw (self-countersinking pilot) at a 45-degree angle through the board into the subfloor, and fill in the hole with the same putty.
- Or employ a specially designed squeak-repair kit that disassociates the screw head below the surface.
From Below (Basement or Crawlspace Access)
- Find the squeaky spot and go under it to find the joist.
- Use construction adhesive between the subfloor and joist or drive shims into small gaps between the joist and subfloor.
- This is the longer-lasting solution as there are no new holes in your existing flooring.
Why It Happens on Original Floors Specifically
Older houses may have been constructed with cut nails rather than the spiral or ring-shank nails that are common today, and these nails are not as secure over the years of humidity cycling. That’s why older homes squeak more than new ones; it has more to do with materials than poor original workmanship.
6. How to Restore Original Hardwood Floors From Water Damage
Water damage is one of the most complex original hardwood floor issues, as it is only possible to fix the issue depending on the level of water damage.
Light Staining or Cloudiness
Cloudy spots are typically white or gray and are caused by moisture under the finish, not underneath the wood.
- Use an iron on a low setting for a couple of seconds over a cloth; this might allow moisture to be trapped out.
- Otherwise, a light screen-and-recoat (see Section 2) typically fixes the problem.
Cupping (Boards Higher at the Edges)
This implies that more moisture has been absorbed into the bottom of the board than on the top.
- Start by fixing the moisture source (leak, humidity, poor airflow).
- Allow the floor to acclimate and dry for 1–2 weeks; avoid sanding a cupped floor, as you will form a crown when the floor dries flat.
- When moisture content has reached a steady state, sand and refinish as usual.
Dark Stains or Rot
When you see black or dark gray stains, it is most likely that the wood is not just stained but also has long-term rot, too.
- Deep stains can usually only be removed by wood bleaching (oxalic acid) before refinishing; sanding alone will not remove these.
- Any board that is soft, spongy, or crumbles when compressed needs to be cut out and replaced with a matching reclaimed board; no surface treatment can cure structural rot.
7. How to Restore Original Parquet Flooring
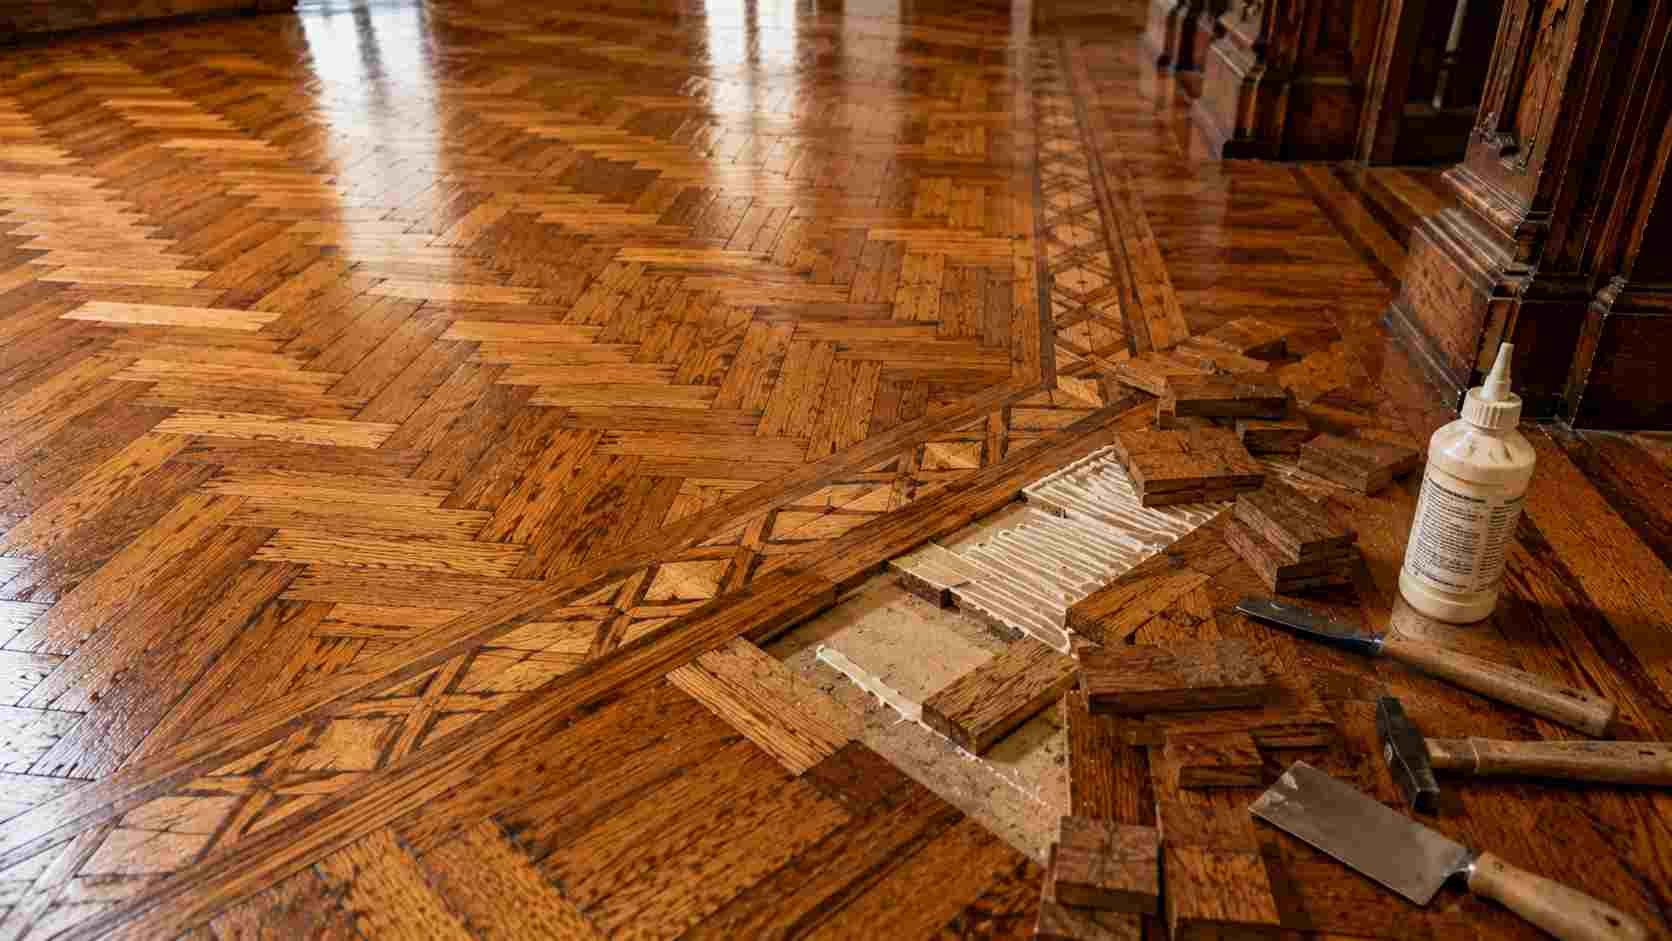
Parquet floors (1920s-1970s) require a softer approach since the individual tiles/blocks are thinner and are often glued-on.
Assess Tile-by-Tile
Damage to parquet is generally restricted to individual pieces of flooring, whereas with plank flooring it is typically more widespread. Walk the floor and record any loose, cracked, or lifting tiles separately from the overall wear.
Re-Adhere Loose Tiles First
Carefully remove loose tiles, clean off old adhesive, and re-attach using a modern flooring adhesive specified for wood parquet. Loose tiles can snag the sander and cause further damage if sanded over.
Sand With the Pattern, Not Against It
Since parquet grain runs in many directions (herringbone, basketweave), never use a drum sander, as it can gouge wood against the direction of the drum. It is this one detail that causes so many DIY parquet refinishes to fail.
Expect More Filler Work
Parquet floors will usually have a higher number of seams than plank floors; allow for additional time and filler around the number of seams between blocks.
8. Refinish or Replace? Cost & Decision Table
Not every original floor is worth restoring. Here’s a practical breakdown:
| Condition | Recommended Fix | Approx. Cost (per sq ft) | Keep Original? |
| Dull, dirty, minor scratches | Deep clean + rejuvenator | $0.20–$0.50 | Yes |
| Worn finish, light wear | Screen and recoat | $1–$2 | Yes |
| Deep scratches, stains, uneven old finish | Full sand & refinish | $3–$5 (DIY) / $5–$8 (pro) | Yes |
| Gaps, cracks, minor squeaks | Filler/rope + spot repair | $0.50–$1.50 | Yes |
| Cupping/water damage (fixable) | Dry out, then refinish | $4–$7 | Yes |
| Rot, structural damage, boards under 1/8″ remaining | Replace affected boards | $6–$12 | Partial |
| Less than 1/8″ wood left after repeated sanding | Replace | $8–$14 | No |
The rule of thumb is: When over 30 percent of a room requires board replacement, it’s often better to replace the entire room, rather than patch it in pieces (matching old wood color and grain becomes increasingly difficult the more new boards that are added).
FAQ: People Also Ask
How much does it cost to restore original hardwood floors?
The cost of do-it-yourself restoration is $0.50 to $5 per square foot, and professional refinishing is $3 to $8 per square foot. The cost of a 300-square-foot room can vary from $150 DIY to $2,400 professionally, primarily depending on the need for sanding.
Can you restore hardwood floors without sanding?
Yes, if the finish is still intact and is only cosmetically worn. Deep cleaning, screening and recoat, and rejuvenating polishes can add back luster and minor scratches without stripping away wood and can save time and money as compared to refinishing.
How do I know if my floors need refinishing or replacing?
Measure the remaining thickness of wood over the tongue at the vent or edge of the closet. If it is less than 1/8 inch, sanding will reveal the nail heads or joints, so now is the time to replace it, rather than risking another refinish.
What’s the difference between resurfacing and refinishing hardwood floors?
Resurfacing involves sanding to bare wood and applying the finish again. The term refinishing is used more generally and can refer to recoating or resurfacing without sanding (always ask if the quote covers recoat or resurface).
How do you fix gaps in old wood floors?
Gaps less than 1/4 inch can be filled with wood-glue-and-sawdust filler, and gaps up to 1/2 inch are frequently filled with a technique of jute rope or cord that is flexible with seasonal movement. If there is a large gap, professional reducer strips will be required.
Why are my hardwood floors squeaky?
Squeaks are caused by boards rubbing against loose nails or other boards when flexed. Older cut nails are not as tightly secured over time as ring shank nails are, and so older original floors squeak more often.
Can water-damaged hardwood floors be saved?
Often, yes. Gentle heat or a screen-and-recoat can be used to treat light cloudiness. The moisture source should be corrected, and allow 1-2 weeks for moisture to dry from cupped boards before refinishing. If there are dark stains from rot, these may require bleaching or board replacement.
Is it cheaper to refinish or replace hardwood floors?
Refinishing is nearly always less expensive (usually 50-70% of replacement cost), provided that at least 1/8 inch of usable wood is still visible above the tongue, and the structural rot is not widespread.
Conclusion
There are only three things to keep in mind when restoring original hardwood floors: accurately diagnosing the damage, selecting the least intrusive restoration technique that will actually repair it, and determining when a complete sand-and-refinish is necessary rather than a waste of time.
Key takeaways
- Before deciding on a method, always measure the thickness and type of wear layer. This will let you know whether sanding is even a possibility.
- If the problem is dullness and light wear, try the no-sand methods first, as they will address most of the light-wear and dullness complaints at a much lower cost.
- There are well-known solutions for gaps, cracks, squeaks, and water damage; don’t assume that a complete replacement is the only solution.
One of the most valuable and difficult-to-duplicate characteristics of an older home is its original hardwood floors. Most can be revived without a contractor’s invoice, with a diagnosis and a weekend of work. Do the assessment steps in section 1 now, and follow the guide, one step at a time, until your floors are how they should be.