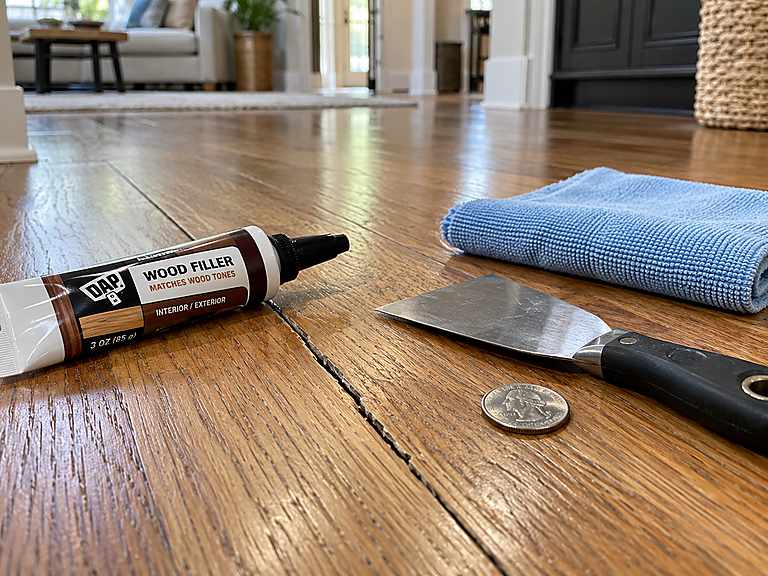
A gap about the thickness of a quarter (around 1.75 millimeters) is often a normal part of having hardwood floors. Many homeowners notice the first winter crack and assume something has gone wrong. In most cases, the wood is simply responding to changes in moisture levels.
Hardwood naturally absorbs and releases moisture throughout the year. During dry, heated winter months, boards lose moisture and shrink, which can create small openings between planks. Knowing how to fix cracks in hardwood floors starts with understanding which gaps are normal, which ones need attention, and which ones may point to a deeper issue.
Short answer: clean the crack, choose a repair method based on the gap size (flexible filler for small cracks, glued wood slivers for wider gaps, and board replacement for serious splits), then keep indoor humidity stable to prevent the problem from returning.
In this guide, you’ll learn:
- Why floors crack and what counts as normal
- How to diagnose a crack, gap, or split in minutes
- How to fill cracks in hardwood floors, including how to fix cracks in hardwood flooring seams
- How to fix cracks in old hardwood floors and engineered planks
- How to fix squeaky wood floors from above
- When to refinish, and when to call a pro
Why Hardwood Floors Crack (and What Counts as Normal)
Wood constantly exchanges moisture with the surrounding air. That movement is the reason hardwood floors expand and contract throughout the year. A repair that ignores humidity usually does not last because the same conditions that created the gap will continue affecting the boards.
That is the first thing to understand when learning to fix cracks in hardwood floors.
Seasonal Humidity: The Main Culprit
Winter air is usually drier, especially when heating systems are running. During this period, hardwood boards release moisture and shrink across their width, creating small seams. When humidity rises during summer, the boards absorb moisture and expand again, causing those openings to become smaller.
Wider boards tend to show more movement than narrow strips. Light-colored woods such as maple and floors with pale stains also make gaps more noticeable compared with darker finishes.
Heating systems, wood stoves, and fireplaces can dry indoor air even further. Most guidance recommends maintaining indoor relative humidity between roughly 35% and 55%. Once levels drop below 35%, cracking and seasonal gaps become much more likely.
Installation Problems, Subfloors, and Age
Not every hardwood floor gap is caused by seasonal changes. Some problems begin during installation. Boards that were installed before properly adjusting to the home’s conditions, placed over a damp subfloor, or attached with too few fasteners may develop permanent gaps.
Older floors behave differently because they have spent decades expanding, shrinking, settling, and losing finish. That is why fixing cracks in old hardwood floors requires a separate approach, which we cover later in this guide.
A gap that remains open even during humid summer months deserves more attention. It may indicate moisture problems, movement beneath the floor, or an installation issue.
Why You Hear a Hardwood Floor Cracking Noise When Walking
A hardwood floor cracking noise when walking does not always mean the wood itself is cracked. Many sounds come from movement between materials.
Boards may rub against each other as they expand, nails can loosen over time, or the subfloor may separate slightly from the joists. These issues create popping, ticking, or squeaking sounds.
The source may not be a visible crack, but the cause is often connected to the same moisture and movement issues discussed throughout this guide.
Diagnose First: Crack, Gap, or Split Board?
The repair method depends on what you are actually dealing with. Many failed hardwood floor repairs happen because the wrong material is used for the problem.
Before buying filler or starting a repair, spend a few minutes checking the size and type of damage. The width of the opening is one of the most important details when you are looking into how to fix cracks in wood floors.
The Coin Test: Measure Before You Buy Anything
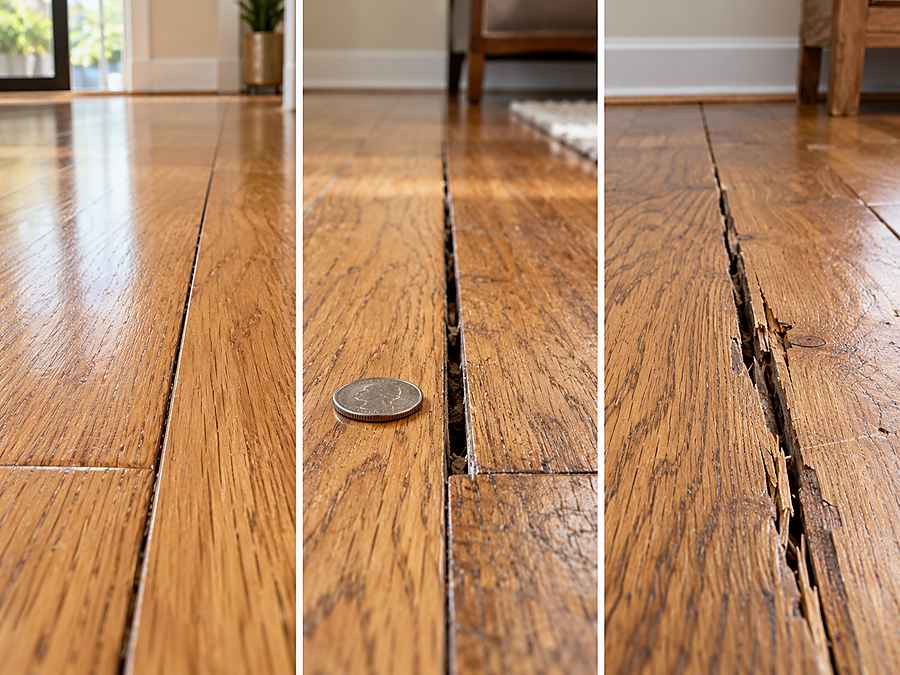
A simple coin test can help estimate the gap size. A dime is about 1.35 mm thick (roughly 1/20 inch), while a quarter measures about 1.75 mm (roughly 1/16 inch).
Slide the coins into the opening and compare the gap with the guide below.
| Gap width | What it usually means | Best approach |
| Hairline to dime thickness | Normal seasonal movement | Clean it, monitor it, or use flexible filler |
| Dime to 1/8 inch | Dry-season shrinkage or aging | Flexible filler in a mid-humidity season |
| 1/8 to 1/4 inch | Persistent gap or wide planks | Glued wood slivers |
| Over 1/4 inch, or a split through a board | Structural, moisture, or impact damage | Slivers, tinted epoxy, or board replacement |
Seasonal or Permanent?
A gap that changes with the seasons usually points to normal wood movement. Take a photo and measure the opening during both winter and summer.
If the gap becomes smaller during humid months, the boards are responding naturally to moisture changes. A rigid filler used in this situation may crack or push out when the wood expands again.
Many professionals prefer making larger repairs during shoulder seasons such as April and October because humidity levels are often closer to the middle range. Gaps that appear immediately after installation require a different approach, which is discussed in how to fix gaps in hardwood floor after installation.
Solid, Engineered, or Finish-Only?
The next step is identifying what is actually damaged.
A line on the surface may be:
- a crack running through the wood
- a natural seam between boards
- a damaged finish layer
Solid hardwood planks can usually handle sanding and deeper repairs because the material runs through the full thickness of the board.
Engineered hardwood is different. It has a thin hardwood wear layer attached over a plywood or fiberboard core, which limits how much sanding and filling it can handle.
Anyone searching for “how to fix crack in engineered hardwood floor” should first confirm the floor construction. Check an exposed plank edge, remove a vent cover, or compare it with a spare board if one is available.
How to Clean Cracks in Wood Floor Before Filling
Wood filler needs a clean surface to bond properly. Dust, old wax, dirt, and pet hair trapped inside a crack can prevent the repair from holding.
Before learning how to fill cracks in hardwood floors, prepare the area carefully so the filler has a proper surface to grip.
How to Clean the Cracks in Hardwood Floor (Finished Boards)
- Vacuum the seams using a crevice attachment.
- Remove packed debris with a plastic putty knife, old credit card, or wooden skewer.
- Lightly scrub the area with a soft toothbrush.
- Wipe the surface using a barely damp microfiber cloth and a pH-neutral hardwood cleaner.
- Dry the area immediately.
Avoid steam mops. Steam pushes moisture into the seams and may cause the edges of hardwood boards to swell.
How to Clean Dirt in Grooves of Hardwood Floors
Dirt often collects along beveled edges and grooves. Use a stiff nylon brush or dental pick to loosen buildup, then vacuum away the debris.
For leftover residue, a cotton swab lightly dampened with cleaner can help remove small areas. Always test solvents in a hidden location first because some products can damage the floor finish.
How to Clean Unfinished Hardwood Floors (Untreated and Unsealed)
Unfinished wood absorbs moisture easily, stains quickly, and can develop raised grain when exposed to liquid. Start with dry cleaning methods.
For how to clean unfinished hardwood floors, use a vacuum with a soft brush attachment, a dust mop, and then a well-wrung microfiber cloth. Work in the direction of the grain and dry the surface immediately.
The same method applies to untreated hardwood floors.
For oily dirt, cleaning unsealed hardwood floors may require a small amount of mineral spirits applied with a cloth in a well-ventilated area. Sealing the floor afterward can help protect it from future dirt buildup.
How to Fill Cracks in Hardwood Floors: Step-by-Step Methods
The right repair depends mainly on the size of the gap and the condition of the boards. Small surface cracks and seasonal openings need a different solution than deep splits or damaged planks.
The comparison table at the end of this section shows how each repair method compares.
How to Fix Cracks in Wood Floors With Flexible Filler
Flexible filler works best for hairline cracks and smaller gaps up to about 1/8 inch. Choose a filler that matches the wood species, floor finish, and the type of crack you are repairing.
Common options include:
- Latex or acrylic: Flexible, easy to sand, accepts stain, and resists water.
- Water-based: Dries quickly, has low odor, and cleans up easily.
- Solvent-based: Provides stronger adhesion for deeper gaps but requires good ventilation.
- Epoxy: Creates a strong bond for splits, with about 20 minutes of working time. Test the color before applying because matching it later can be difficult.
Steps:
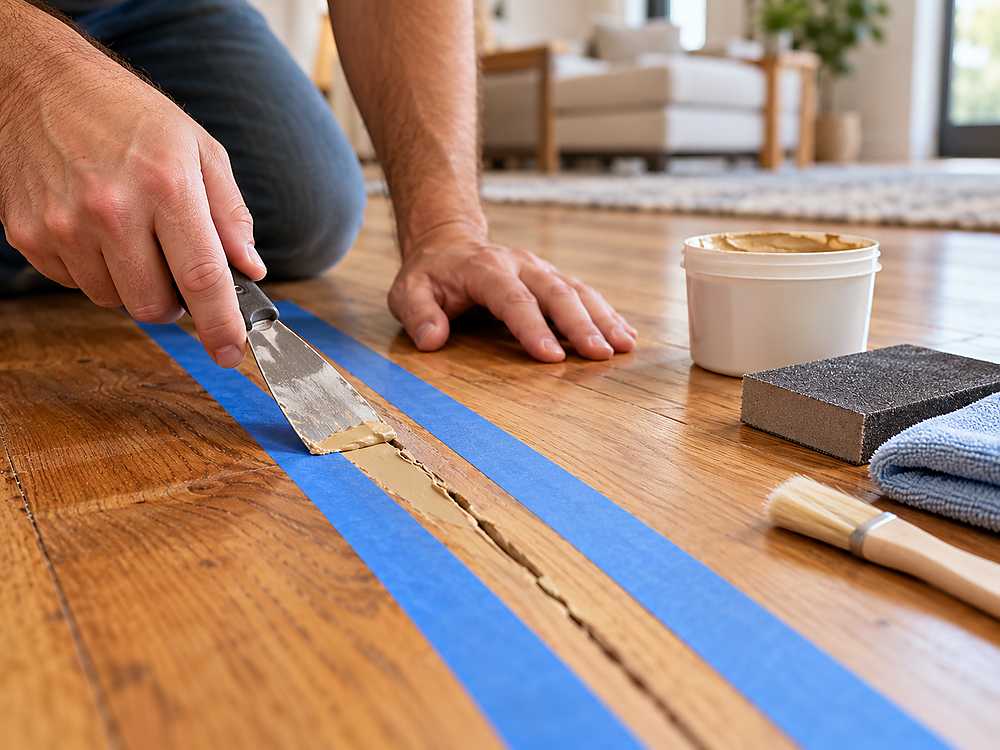
- Cover the boards on both sides of the crack with painter’s tape.
- Push the filler into the crack using a flexible putty knife held at an angle.
- Apply slightly more filler than needed, then smooth the surface.
- Allow it to cure for at least 6 hours. Overnight curing usually gives better results.
- Sand the repaired area flush using fine-grit paper while avoiding nearby boards.
- Apply matching stain and a compatible topcoat.
How to Fix Gaps in Hardwood Floors With Wood Slivers
For gaps between 1/8 and about 1/4 inch, wood slivers usually perform better than filler. Since they are made from real wood, they expand and contract with the surrounding floor.
Cut strips from the same wood species so they match the existing boards. Make the strips slightly taller than the opening and shape them into thin wedges.
Apply wood glue along the sides of the sliver, tap it into place with a mallet, and allow it to dry. Once secure, plane or sand the surface until it sits level with the floor.
For gaps wider than about 3/8 inch (1 cm), add support material underneath first. Backer rod, jute twine, or wood shavings can prevent filler from sinking too deeply into the opening.
How to Fix Cracks in Hardwood Flooring Seams
Open seams that run evenly across a room are usually caused by seasonal shrinkage. These can often be repaired with flexible filler or wood slivers.
A different approach is needed when seams appear only at board ends, collect in one area, or feel loose when stepped on. Those signs may indicate movement between boards.
For loose boards, drill small pilot holes first, then drive finishing nails through the board into the joist. Countersink the nail heads and fill the holes with matching filler.
If you are working on fixing cracks in hardwood flooring seams during winter, remember that the gaps may close when humidity rises. Rigid fillers can fail because expanding boards put pressure on the repair.
How to Fix Large Crack in Hardwood Floor (Over 1/4 Inch)
A split that goes through the thickness of a board usually requires more than filler. Start by correcting the humidity problem before repairing the damage.
Depending on the condition, the repair may involve tinted epoxy or replacing the damaged board.
For replacing a solid hardwood board:
- Cut through the center of the damaged board along the grain using an oscillating tool.
- Remove the remaining edges carefully with a chisel.
- Test-fit a replacement board after trimming the bottom groove lip.
- Glue and nail the new board into position.
- Sand and refinish the repaired area.
If you searched “how to fix large crack in hardwood floor” and the repair feels beyond your skill level, hiring a professional for board replacement is often the safer option.
Repair Method Comparison
| Method | Best for | Difficulty | Durability | Flexibility |
| Latex/acrylic filler | Hairline to 1/8 inch | Easy | Moderate | High |
| Water-based filler | Small cracks, nail holes | Easy | Moderate | Medium |
| Solvent-based filler | Deeper gaps | Moderate | High | Low |
| Epoxy | Splits through a board | Moderate | Very high | Low |
| Wood slivers | 1/8 to 1/4 inch gaps | Moderate | Highest | Moves with floor |
| Board replacement | Large splits, damaged boards | Hard | Highest | Not applicable |
Special Cases: New, Old, and Engineered Hardwood Floors
How to Fix Gaps in Hardwood Floor After Installation
Some movement during the first year after installation is expected as the floor adjusts to the home’s environment. Instead of immediately filling gaps, allow the floor to go through a complete heating season first, ideally until spring.
Track humidity with a hygrometer and keep records of the readings. Taking photos of the gaps can also help when discussing the issue with the installer, especially because many warranties depend on proper acclimation and humidity conditions.
If gaps remain wide during summer, the cause may be boards that were installed too wet, insufficient acclimation, or moisture beneath the floor.
Once humidity is stable, fixing gaps in hardwood floors usually involves either flexible filler or wood slivers depending on the gap size.
How to Fix Cracks in Old Hardwood Floors
Older hardwood floors often have different repair needs compared with newer installations. Many traditional solid hardwood floors are around 3/4 inch thick, which gives them more room for sanding, filling, and refinishing than thinner modern products.
Before applying filler or a new finish, remove old wax because repair materials do not bond properly to wax-covered surfaces.
Homes built before 1978 require extra caution. Older paint or finish layers may contain lead, so test the surface before sanding or disturbing the material. If lead is detected, follow the EPA Lead Renovation, Repair and Painting (RRP) Program guidelines and hire a certified professional to handle the work safely.
Old boards can become brittle over time. Pre-drill holes before installing nails to reduce the chance of splitting the wood.
It is also worth remembering that some gaps are part of the appearance and history of an older floor. Not every opening needs to be filled. That is an important part of understanding how to fix cracks in old hardwood floors.
How to Fix Cracks in Engineered Hardwood Floor Planks
Engineered hardwood requires a more careful approach because the top hardwood layer is limited in thickness. Wear layers commonly measure around 2 to 6 mm, which restricts how much sanding can be done.
Small cracks and chips near the surface can often be treated with color-matched wax or putty sticks.
Floating floors with click-lock connections may develop gaps between planks. In some cases, removing the baseboards and using a pull bar with a tapping block can help close those gaps. Always confirm the manufacturer’s recommended perimeter expansion space, which is often around 1/2 inch.
Swollen edges, separated layers, or soft areas usually indicate moisture damage. In those cases, replacing the affected plank is often necessary.
Silence the Noise: Squeaks and Cracking Sounds
A noisy hardwood floor does not always have a cracked board. Most squeaks happen because boards rub together or because fasteners have loosened over time.
In many situations, the problem can be corrected without removing any flooring.
Hardwood Floor Cracking Noise When Walking: Find the Source
Walk slowly across the floor and mark each noisy area with painter’s tape.
Use a stud finder to locate joists, or follow visible nail patterns if they are available.
A board that moves up and down under your foot is likely loose. A sound that appears when your weight shifts across a seam is usually caused by friction between boards.
Quick Fix for Squeaky Hardwood Floors
Powdered lubricants can reduce friction between moving boards.
Apply powdered graphite, talcum powder, or powdered soapstone into the seam. Cover the area with a cloth and step on it so the powder works deeper into the gap.
Repeat the process once or twice if needed.
For floors with a wax finish instead of urethane, a small amount of liquid wax between boards may also help.
This repair can often be completed in about ten minutes without using tools.
How to Fix Squeaky Wood Floors From Above
If lubrication does not solve the problem, the board may need to be secured.
First, drill a pilot hole slightly smaller than the nail or screw being used. Start at least 1/2 inch away from the board edge and angle the fastener slightly toward the center of the board.
Drive a finishing nail or trim-head screw through the board and into the joist. Countersink the head, then cover the hole with matching filler.
Breakaway screw kits can make this process easier because they are designed to snap below the surface.
If the underside of the floor is accessible, additional solutions include placing shims between the subfloor and joist, applying construction adhesive, or adding blocking for support.
Refinishing: When Patches Aren’t Enough
How Hard Is It to Refinish Hardwood Floors?
Refinishing hardwood floors requires physical work and creates a lot of dust. It is considered moderately difficult, especially because a drum sander can damage the floor quickly if handled incorrectly.
The entire process usually takes three to five days when drying and curing time are included.
Professionals generally charge several dollars per square foot, while DIY hardwood flooring projects involve equipment rental and material costs.
Each complete sanding removes approximately 1/32 to 1/16 inch of wood, so check that the boards still have enough thickness before starting.
How to Refinish Old Wood Floors
- Remove everything from the room, set raised nails, and repair loose boards.
- Fill cracks or install wood slivers before sanding.
- Sand the floor using progressively finer grits, then sand edges and corners separately.
- Vacuum completely and wipe the surface with a tack cloth.
- Apply stain if desired.
- Add two to three coats of finish while following the manufacturer’s drying and curing instructions.
How to Sand and Restain Hardwood Floors
Use coarse sandpaper (36 to 40 grit) only when dealing with heavy damage. Move next to 60 grit, then finish with 80 or 100 grit.
Always test stain on a hidden area before applying it across the floor. Use stainable filler so repaired sections blend better with the surrounding wood.
Some species, including maple and cherry, can absorb stain unevenly. A pre-stain conditioner can help create a more consistent appearance.
Remove excess stain, allow it to dry fully, and apply a protective seal before allowing regular foot traffic.
Prevent Cracks From Coming Back
Repairing a hardwood floor crack is only part of the solution. If the conditions that caused the gap remain unchanged, the same issue may return.
Control Humidity Year-Round
Keep indoor relative humidity between 35% and 55% by using a hygrometer to monitor conditions.
During dry winter months, a humidifier can help replace lost moisture in the air. In humid seasons, air conditioning or a dehumidifier can reduce excess moisture.
Stable humidity reduces seasonal movement more effectively than repeatedly filling gaps. It is the habit that makes fixing cracks in hardwood floors a lasting repair instead of a repeated maintenance task.
Pets, Kids, and Allergy-Sensitive Households
Small gaps between boards can collect pet hair, dust, and pollen. Filling those spaces reduces areas where debris can accumulate.
Use a HEPA vacuum with a crevice attachment for regular cleaning. Low-odor, water-based fillers and finishes can be useful choices when working in homes with children, pets, or allergy concerns.
Keep children and pets away from repaired areas until the material has completely cured.
Clean pet accidents quickly because moisture can cause wood to swell around cracks. Extra care is also needed when cleaning unsealed hardwood floors after spills.
Rental Properties and Landlords
Rental properties benefit from clear documentation. Photograph the floor before tenants move in, explain that seasonal hardwood movement can occur, and include humidity recommendations in the lease.
Regular inspections can help separate normal seasonal changes from damage that needs repair.
When to Call a Pro or Replace Boards
Red Flags That Aren’t Cosmetic
Some floor problems are more than surface-level cracks.
Contact a professional if you notice:
- soft areas in the floor
- dark staining
- mold
- cupping or buckling
- gaps that remain open throughout every season
- a floor that feels springy when walked on
These signs may point to water damage or problems below the flooring. In these situations, fixing a large crack in hardwood floor is no longer the main concern until the moisture or structural issue is addressed.
How to Choose a Pro
Before hiring someone, collect two or three repair estimates.
Ask about:
- certifications
- moisture testing
- previous repair projects
- references from similar jobs
A contractor experienced with repairs can provide better insight than someone who only installs new floors.
Frequently Asked Questions
What is the best way to fix cracks in hardwood floors?
Start by cleaning the crack and identifying its size. Small hairline openings usually work well with flexible latex or water-based filler. Gaps between 1/8 and 1/4 inch are often better repaired with glued wood slivers, while major splits may require epoxy or replacing the damaged board. Correct humidity conditions first; otherwise, the repair may open again.
Are cracks in hardwood floors normal?
Yes, seasonal gaps up to about the thickness of a quarter can be normal. Hardwood naturally changes with moisture levels. Boards shrink when winter air becomes dry and expand again during humid months. Gaps that stay open throughout the year, appear suddenly, or come with soft spots, staining, cupping, or other damage should be inspected because they may indicate moisture or structural problems.
Can I fill gaps in hardwood floors in winter?
Yes, but the repair material matters. Flexible filler is usually the better choice because winter gaps are often at their widest. Rigid fillers may crack or push out when warmer, more humid weather causes the boards to expand. Many professionals prefer shoulder seasons such as April and October because humidity levels are usually more moderate.
What is the best filler for cracks in wood floors?
Flexible latex or water-based wood filler works well for many small cracks because it can move slightly with the boards and can be sanded and stained. Solvent-based fillers are useful for deeper repairs, while epoxy works better for structural splits. For gaps larger than 1/8 inch, glued wood slivers generally last longer than filler alone.
What is the quick fix for squeaky hardwood floors?
Apply powdered graphite, talcum powder, or powdered soapstone into the noisy seam, then press it deeper by stepping on a cloth placed over the area. If that does not solve the issue, secure the loose board with a trim-head screw or finishing nail connected to the joist. Countersink the fastener and fill the hole afterward.
Can you fix cracks in engineered hardwood floors?
Yes, but repairs must account for the thinner wear layer. Small cracks and chips can often be treated with color-matched wax or putty. Heavy sanding should be avoided because engineered boards have limited surface thickness. Click-lock gaps may sometimes be corrected with a tapping block, but swollen or separated planks usually require replacement.
How much does it cost to repair hardwood floor cracks?
DIY crack repairs commonly cost around $15 to $60 for filler, tools, and finish touch-up materials. Professional repair costs depend on location, the amount of damage, the wood species, and how accessible the damaged area is. Full refinishing usually costs several dollars per square foot. Getting two or three local estimates gives a clearer idea of the expected cost.
When should I refinish instead of patching?
Refinishing makes more sense when cracks, scratches, and worn finish cover a large portion of the floor or when individual repairs would create an uneven appearance. For isolated damage, patching is usually faster and less expensive. Refinishing allows repairs to blend with the rest of the floor, but it removes a layer of wood, so confirm the board thickness before sanding.
Conclusion
Cracks and gaps do not always mean hardwood flooring is failing. In many cases, they are simply signs that wood is reacting to seasonal moisture changes.
Knowing how to fix cracks in hardwood floors comes down to three main steps:
Key takeaways:
- Diagnose before you repair. Measure the opening with the coin test and observe how it changes over different seasons.
- Match the fix to the width. Use flexible filler for small cracks, wood slivers for wider gaps, and epoxy or replacement for serious splits.
- Control humidity. Keep indoor levels close to 35% to 55% so repairs remain stable.
Start with a hygrometer, a putty knife, and a simple inspection of the smallest crack. For larger repairs, especially those involving soft spots or water damage, bring in a professional before the problem spreads.